Open the Organizer and choose Create new album from the Albums menu.

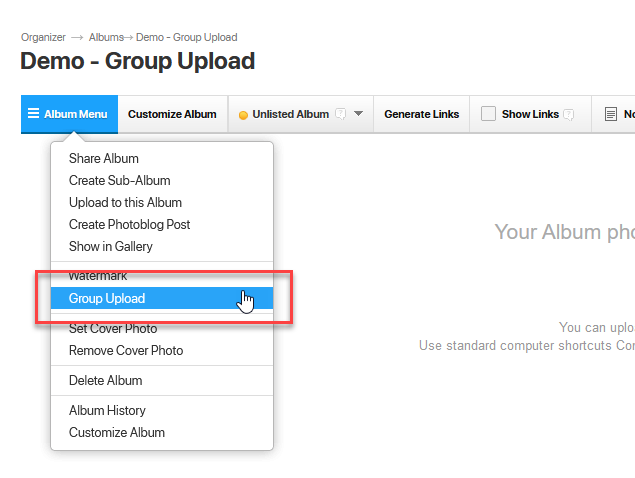
Next, give your new album a name and then go to the album menu and select Group Upload.
Managing the Settings
A window will open where you can manage your album settings. Click Enable Group Upload to make the album a group upload album. You can also enable a Custom group upload url for your album, Send a link and display QR code for group upload (these will show in the Sharing Popup for viewers in the Gallery) and allow photo upload from the Gallery.
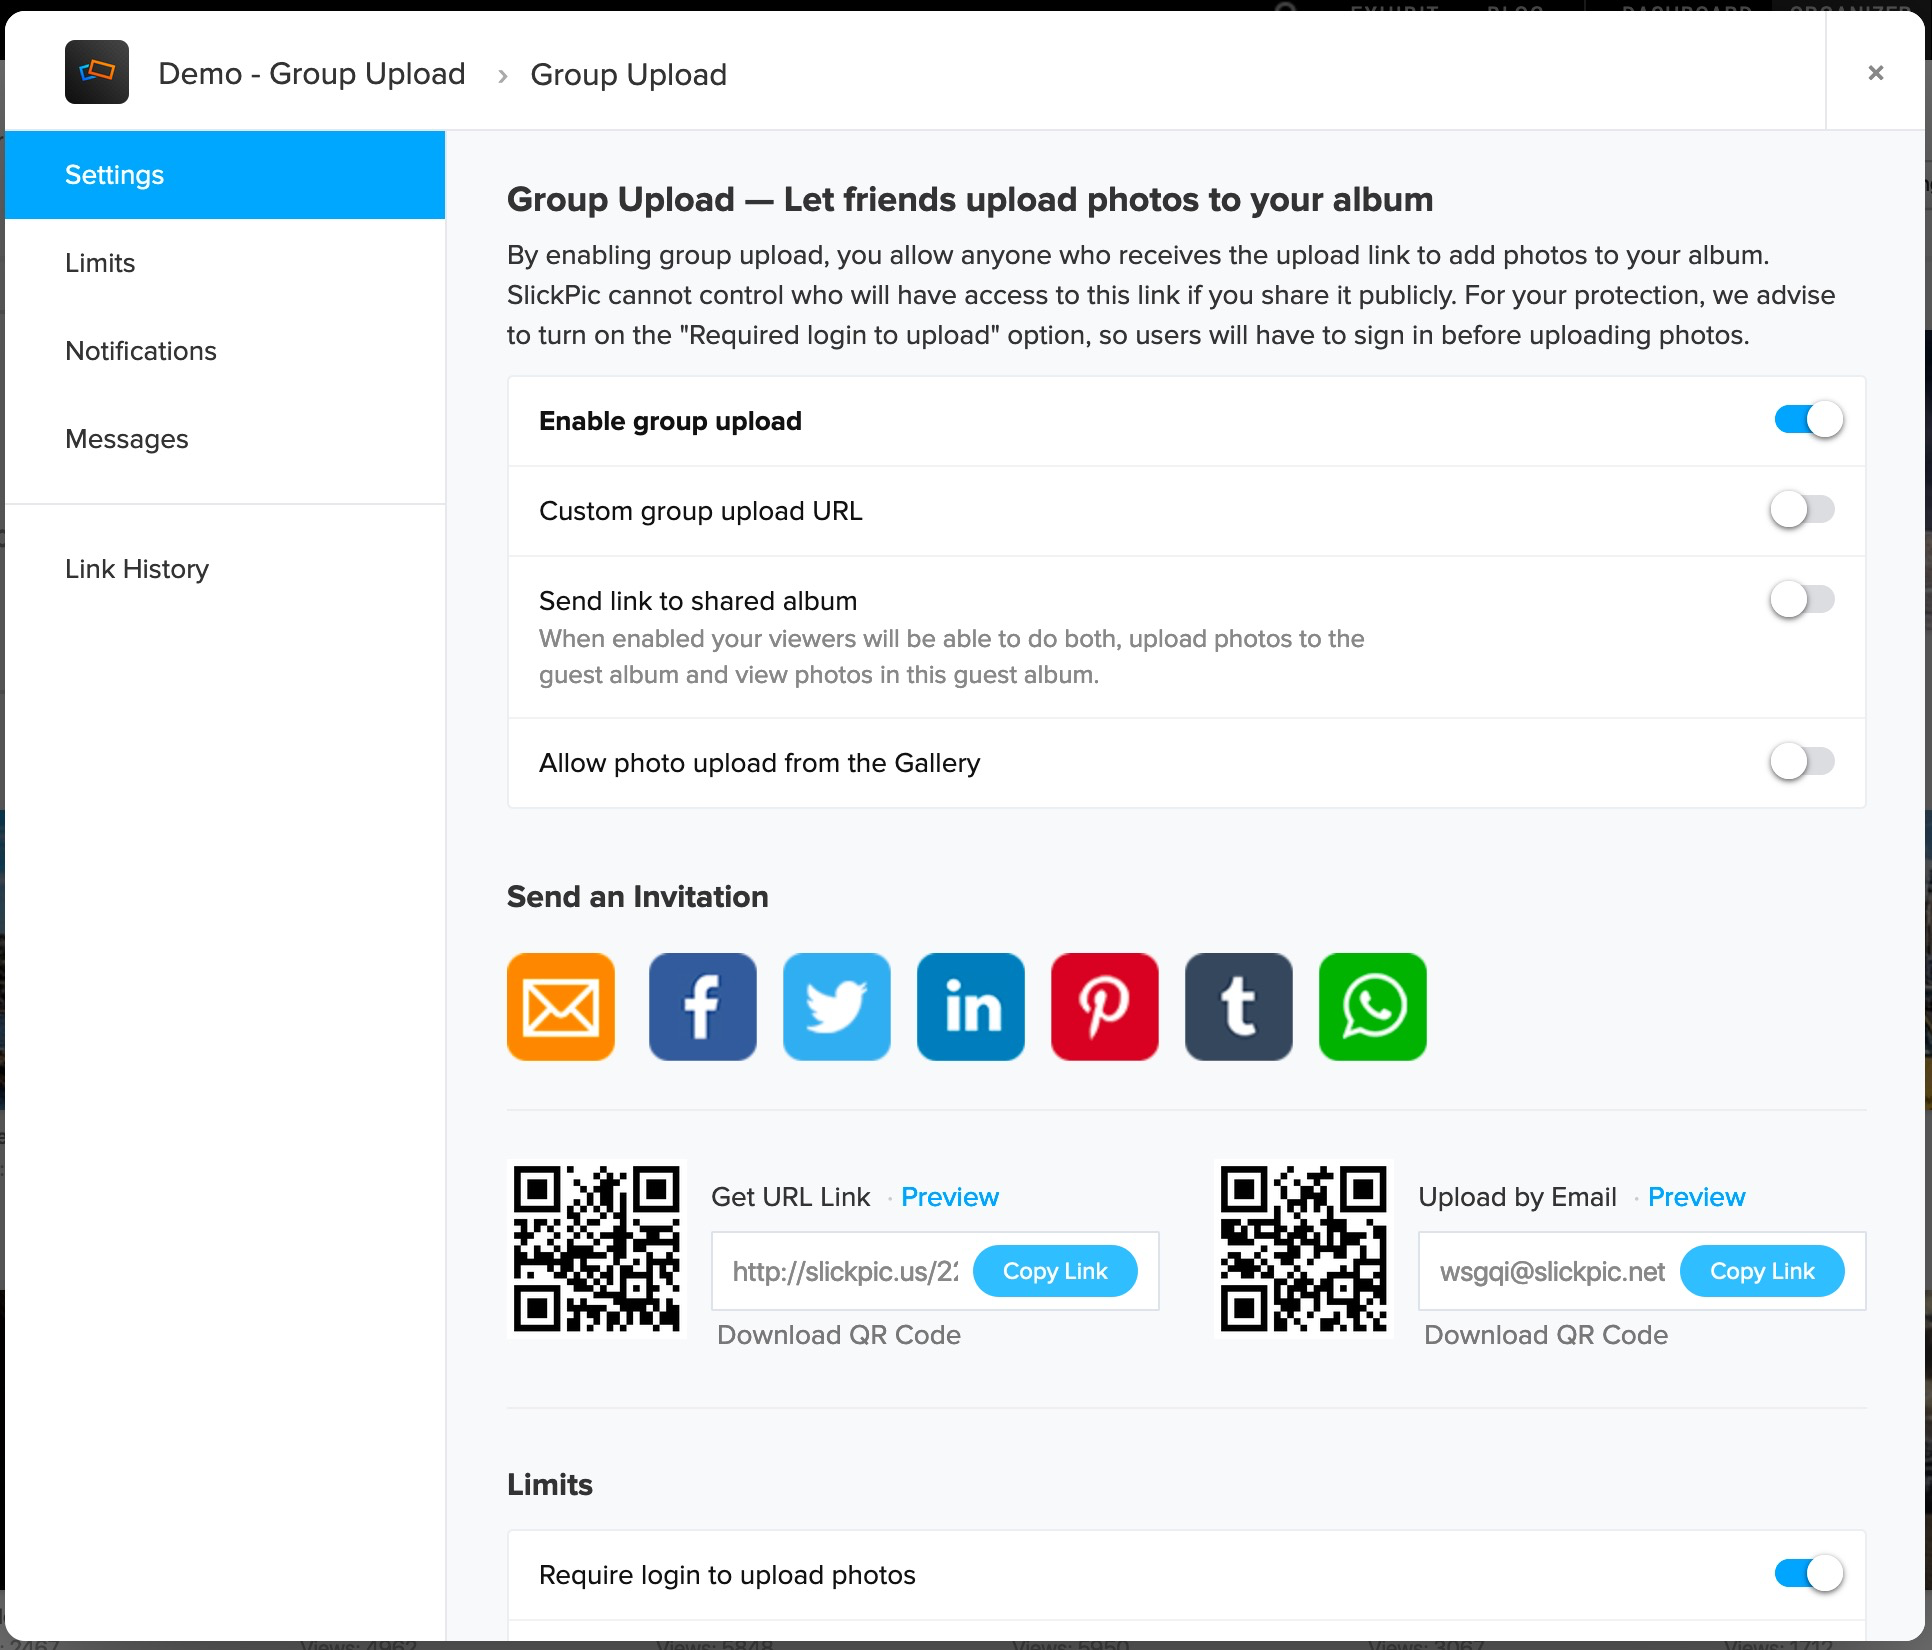
If you enable the Allow photo upload from the gallery, viewers will see an Add Photos button next to the Share button in the gallery and can upload their photos directly from there. The QR code will be visible in the share window.
You will be able to see these buttons and links if you switch to Visitor mode in the gallery.
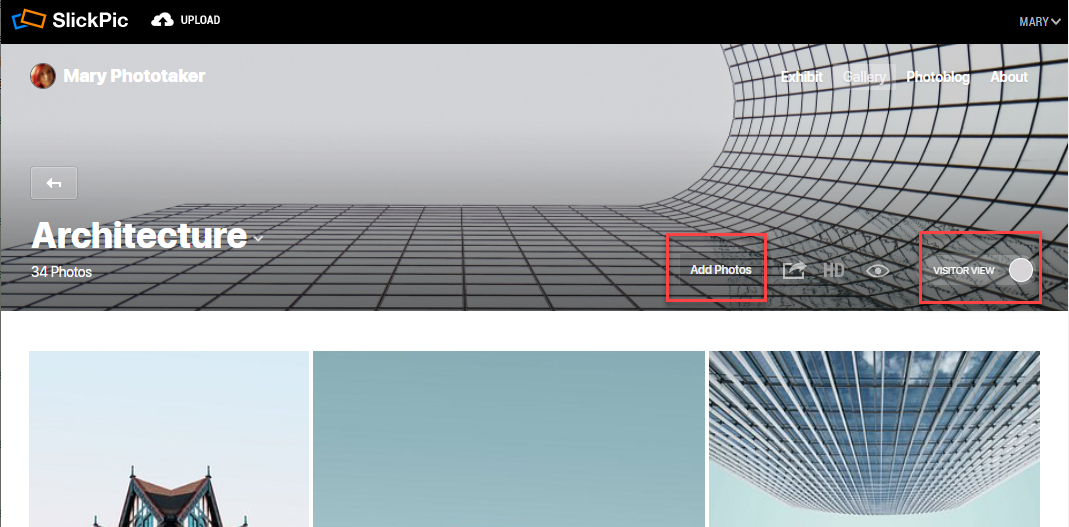
The QR code for the group upload album will show up in the share window alongside the link.

Limits and Notifications
You have a number of further settings which you can use to customize your group upload. For example, deselecting the option Require login to upload photos will make it easier for your friends and family to add their photos to your album.
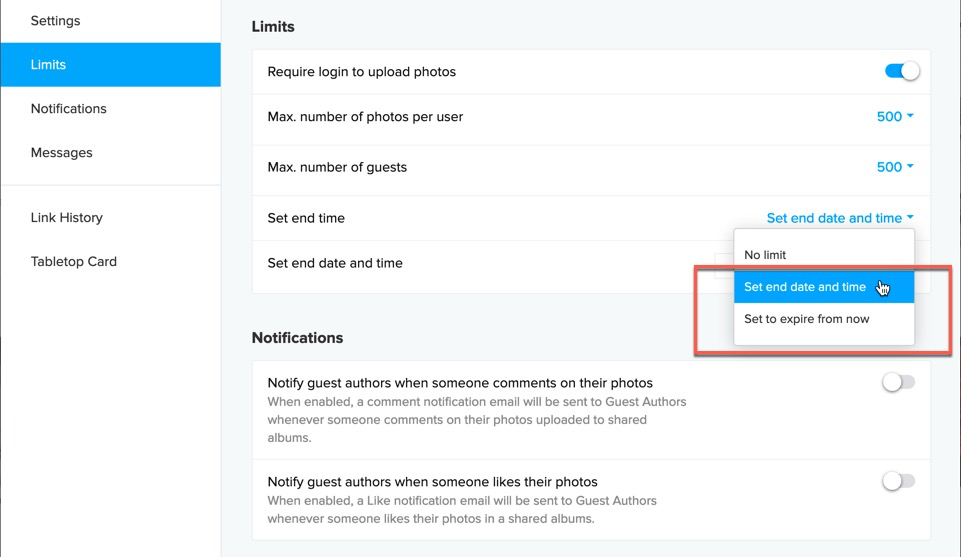
You can set limits on the number of photos that your guests will be able to upload and on the number of guests who will be able to upload.
You also have the option of setting an end date for uploads.
Messages and Notifications
You can choose to receive notifications when there is activity on your album.
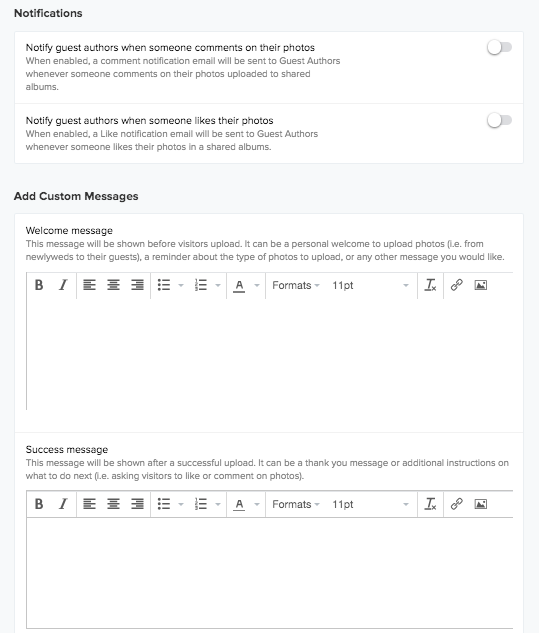
You will also have the option to add a custom message that your collaborators will see either before and/or after uploading their photos.
Invite
Once your settings are as you would like, it’s time to invite your collaborators. Here you can choose from a number of ways to invite people. With the URL Link, you can invite people by email, social media or simply copy the link and send it yourself.
The second link is an email address which will automatically add any photos it receives to the album. Copy it to send it to your collaborators or share it on social media.
You can also download a QR code for both options so that you can add it into printed material. QR codes allow users to join the group upload album just by scanning the code. Very convenient if you are travelling and have shared an experience with other travellers who you don’t have contact details for. Simply share the QR code by showing it on your mobile phone and they will be able to add their photos to the shared album.
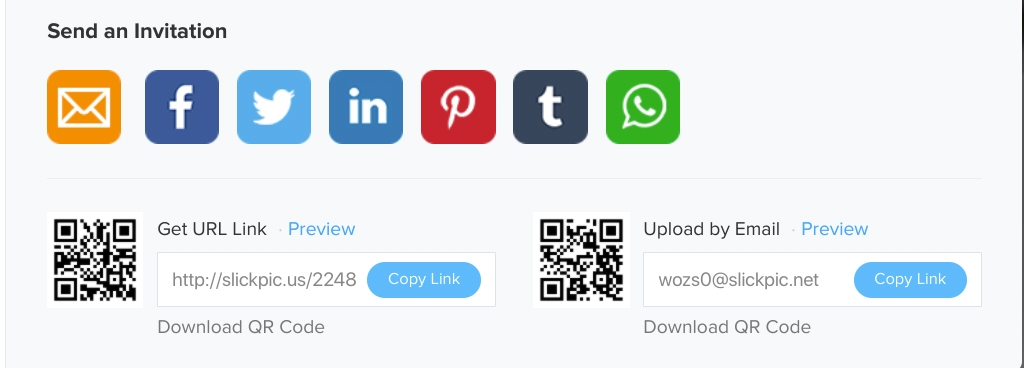
Click Preview to see the album.
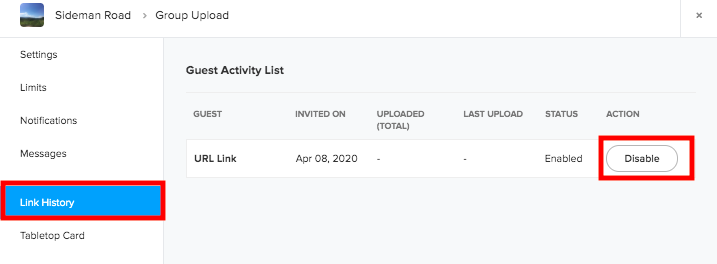
View Link History
Select View Link History to see all the times the link has been shared in the past. You will be able to see when and how many photos were uploaded to your link. Here you can also easily disable the link at any time if you don’t want any more photos to be uploaded to the album.
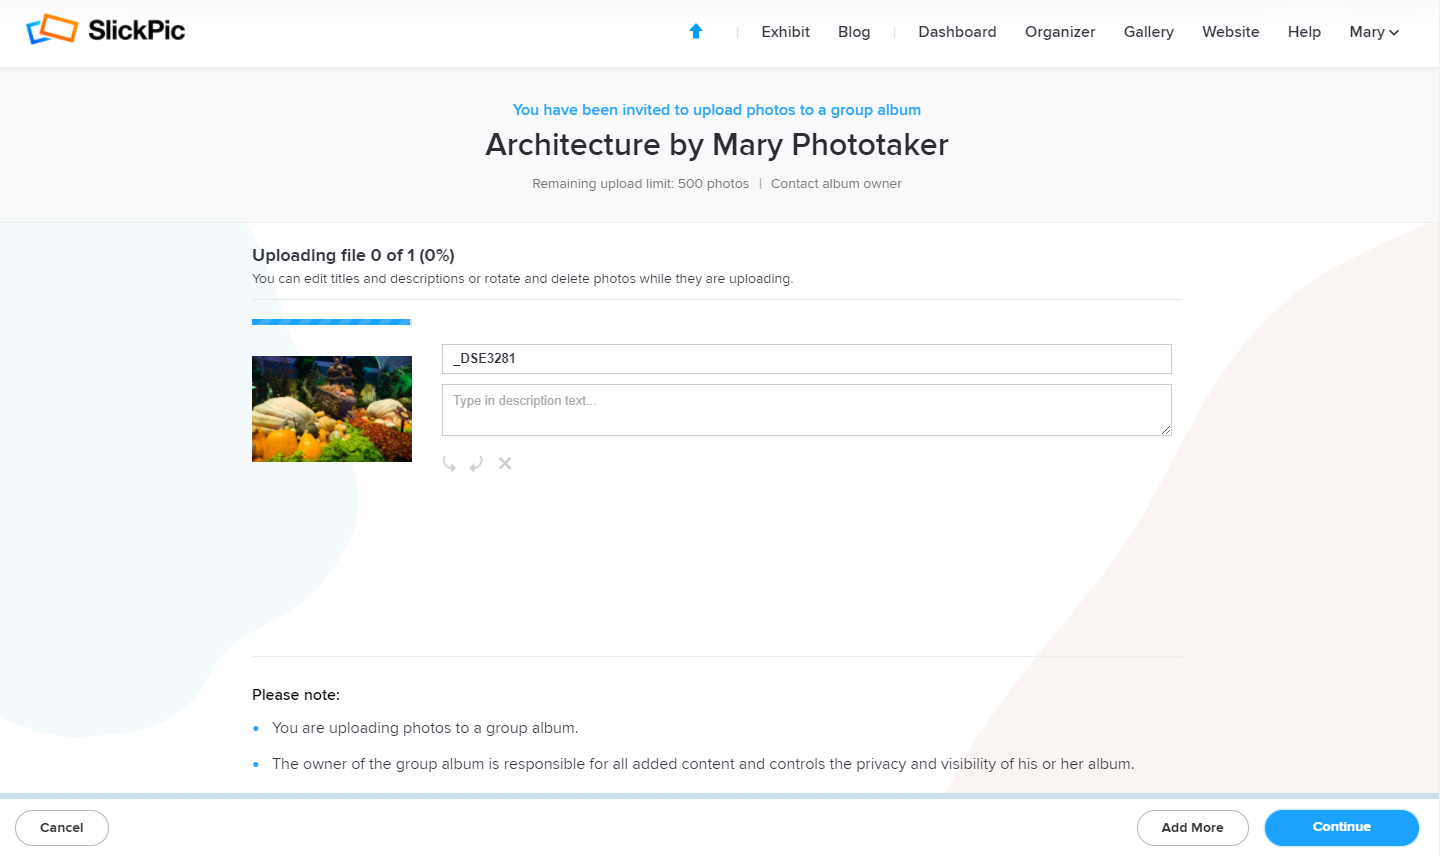
Uploading Photos to the Album
When your guests receive the link to the album, they can choose to upload their photos from their computer, via email or simply drag and drop them into the space. You can also share the album QR code so that users can access the album to upload their photos without a link.
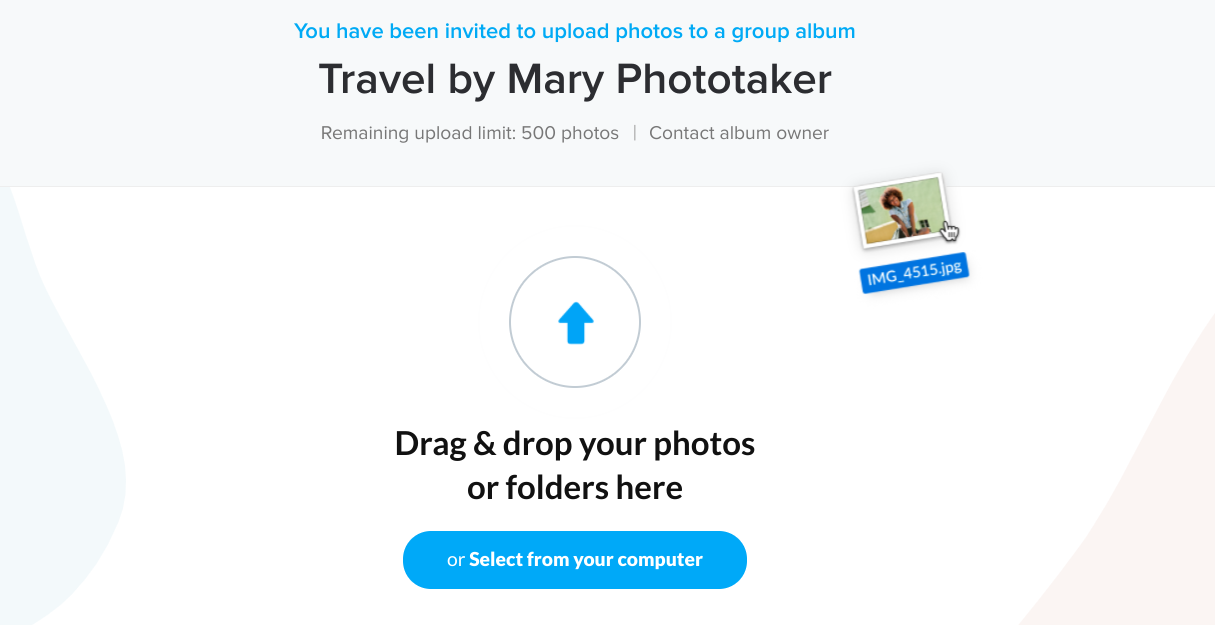
During upload, they can edit the name and add a description.
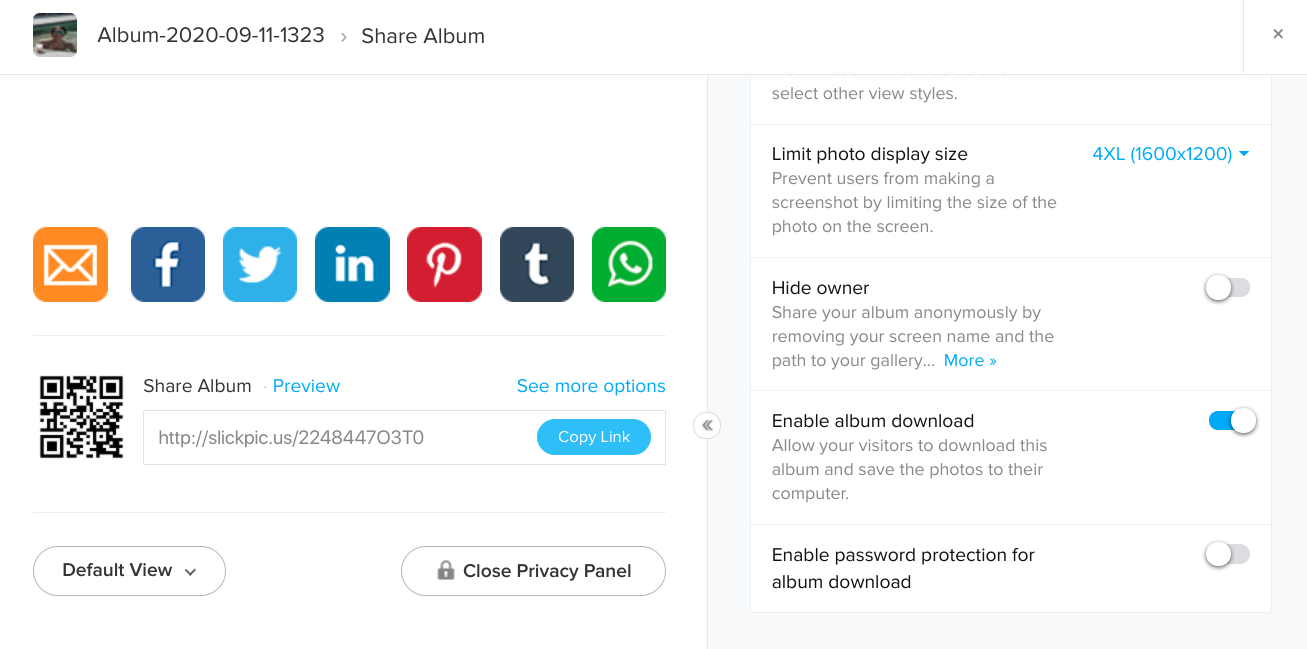
Once your guests’ photos are uploaded to the album, you can choose to share it via the various social media channels or via a link. You can also set the default album view here.
At this step, you can also choose to add privacy settings to manage how the album is viewed, making it accessible for a limited time, or adding password protection.
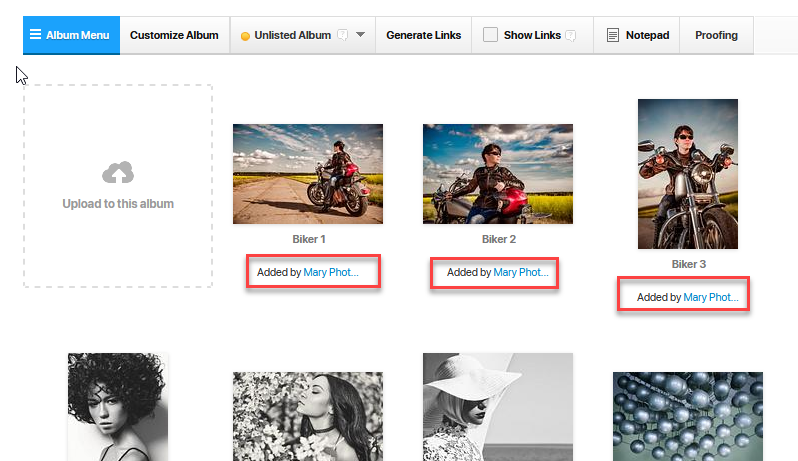
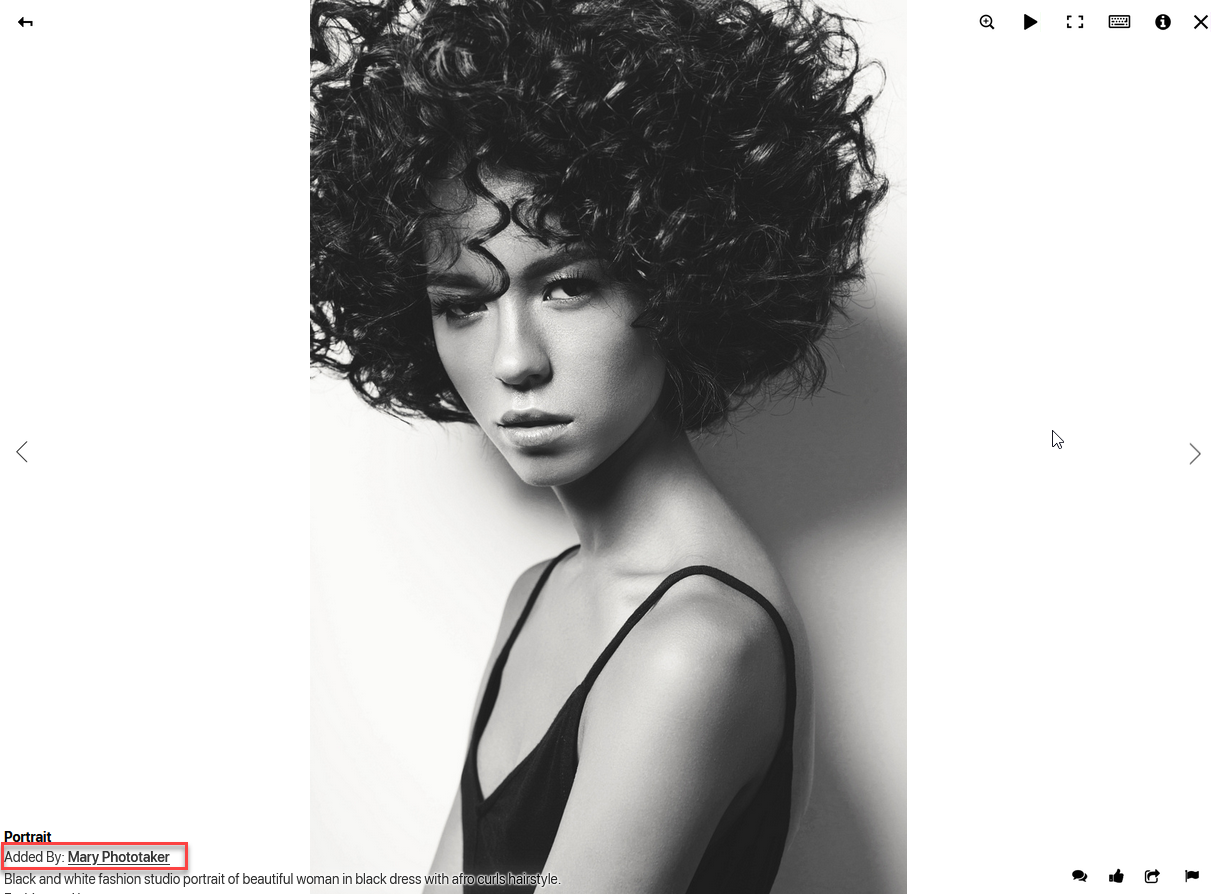
You and your guests will see the name of each uploader on the photos in the Gallery.
Flow view in the Gallery

In Organizer: