Use Collections to group or share photos from different albums. For example, Collections can be designated by theme or category for presentations or to share with specific groups. For more information, see the article What’s the Difference between Albums and Collections.
Creating a Collection
From the Organizer tab, select My Collections.
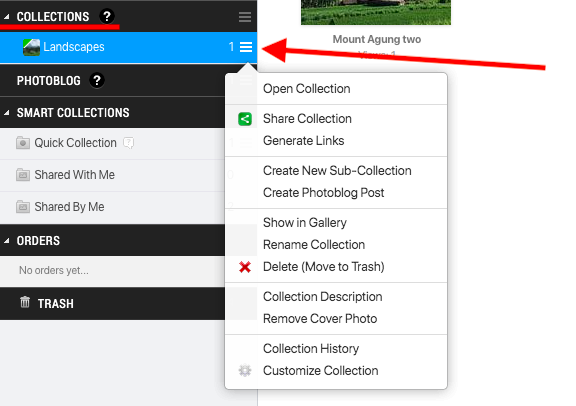
Click on the drop down menu on the right to create a new Collection, or rename or delete an existing collection.
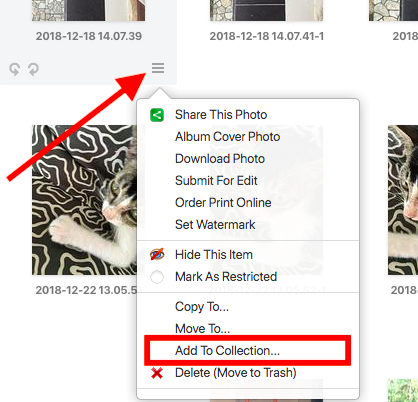
You can also create a Collection directly from an individual photo.
Select the photo that you want to add to the collection, click on the dropdown menu and select Add to Collection.
In the pop-out window, you can either add the photo to an existing collection, or Create New Collection.
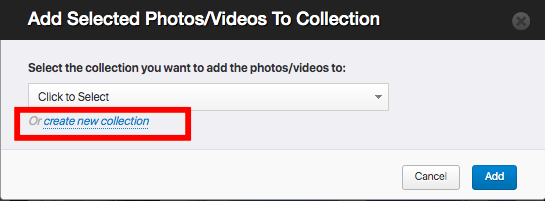
GIve your new Collection a name and you will see it appear in the list on the side menu.
Adding Photos to a Collection
As well as adding a photo to a collection from the individual photo menu, you can also add it by dragging it from the album into the Collection in the side menu.
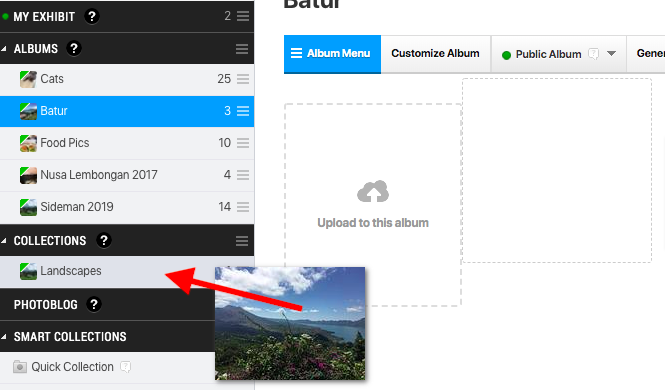
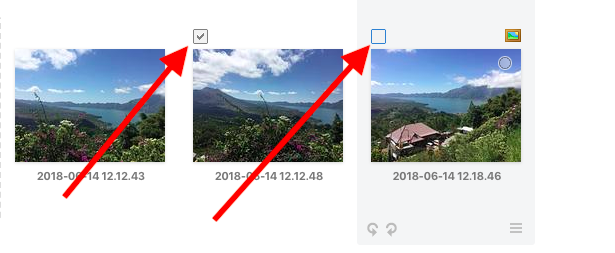
You can also add multiple photos in this way. From the album, select the ones that you want to add, then click and drag and all selected photos will be added at the same time.
Managing Your Collection
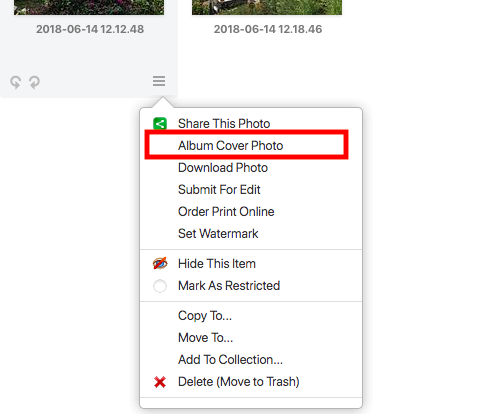
You can reorder your photos in the collection by clicking and dragging them. Additionally, set the cover photo by selecting the photo you want as the cover photo then choosing Album Cover Photo from the menu drop down. You can manage the appearance of the cover photo, see the article How to Set an Album Cover Photo for more details.
Sharing Your Collection
You can share your Collection in the same way that you share an Album. You can share from the Collection Menu, the side menu or from the Share Collection button on the collection page.
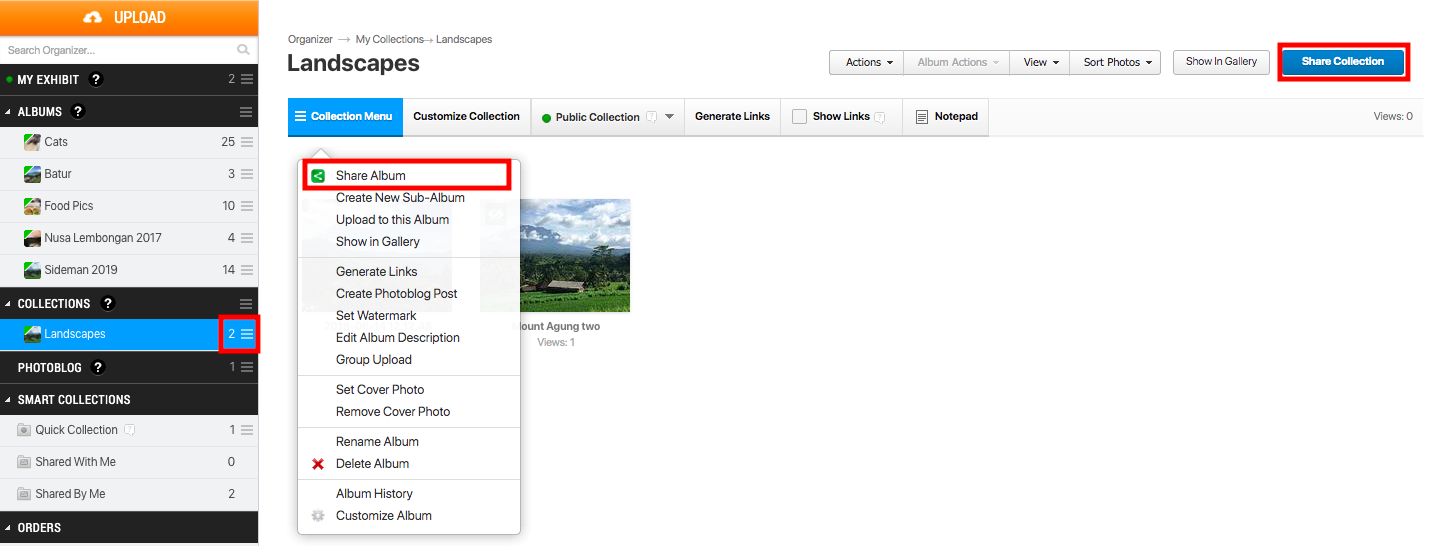
Share your collection via social media, a shareable link, QR code, etc.

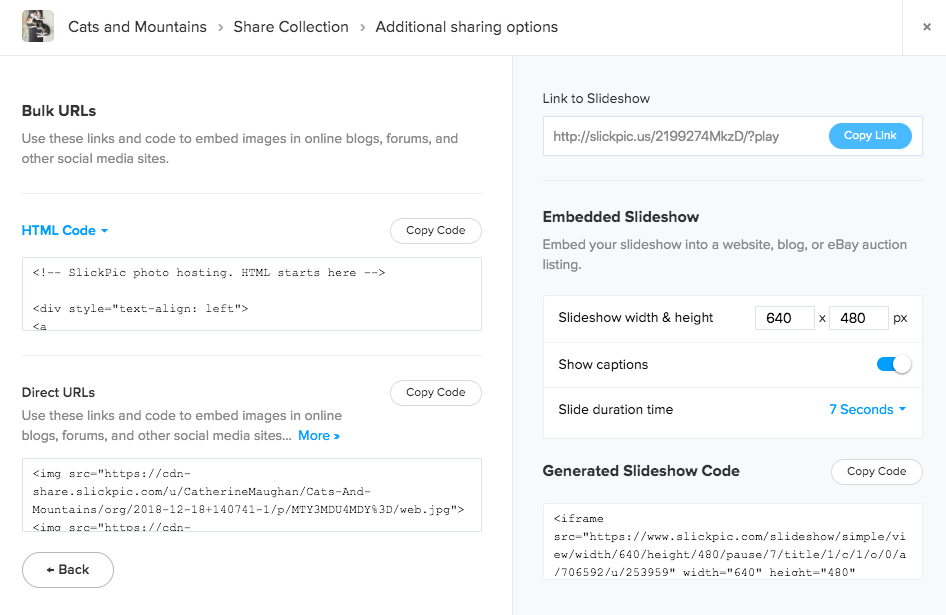
Click See More Options to share your collection as a slideshow or to get embed codes.
