You can Save your preferred settings for Albums/Collections as presets to easily apply them in the future.
Step 1 – Create and Save your Preset
You can create and save custom presets for your Albums/Collections in two ways.
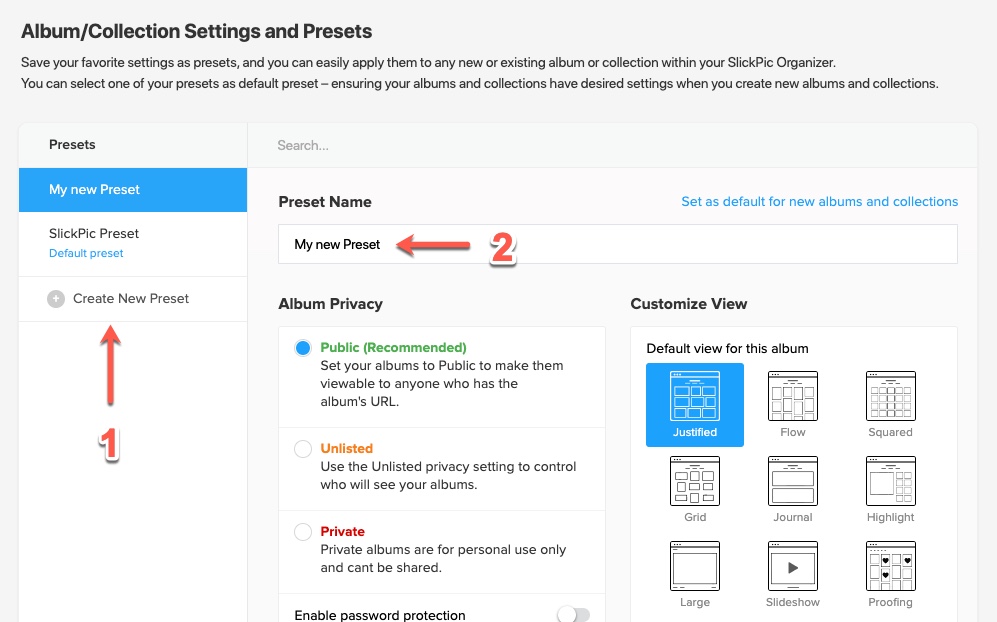
1. Create Album/Collection Presets on your Account page
To get started, go to your Account page and click on the Album/Collection Settings and Presets tab.

You can create a new preset by clicking Create New Preset and giving it a name.
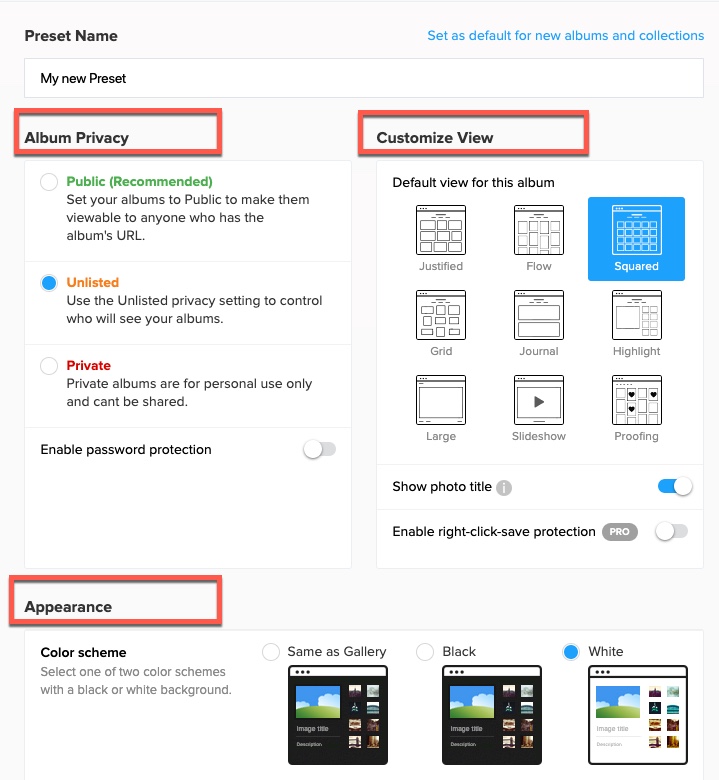
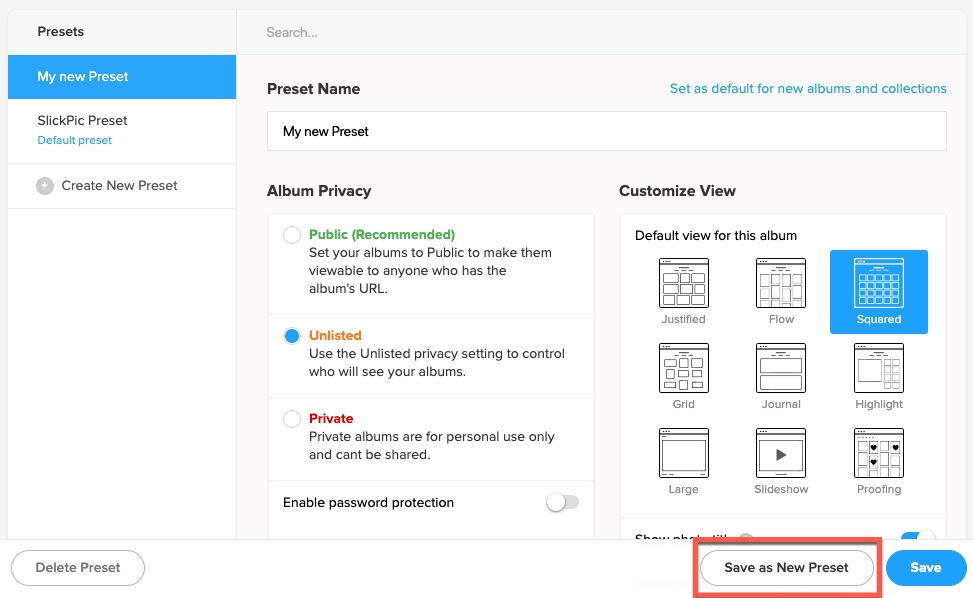
You can customize your album/collection by adjusting settings such as layout, theme, privacy, etc. Here’s an example:
Once you have completed customizing your album/collection settings, click on the Save button to save your changes.
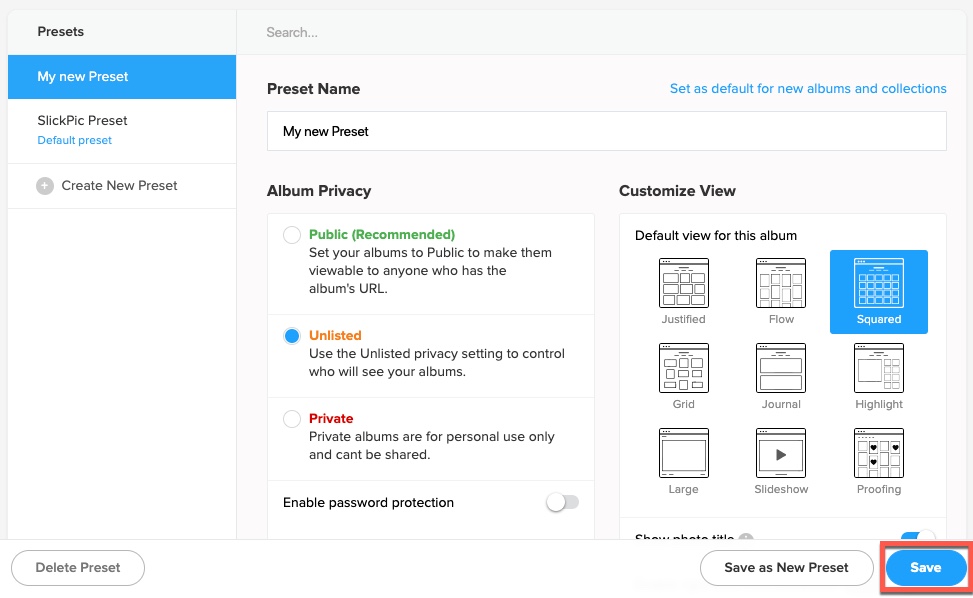
If you want to make a copy of your current preset, select Save as New Preset. This will duplicate your preset, including all current settings, and save it as a new preset.
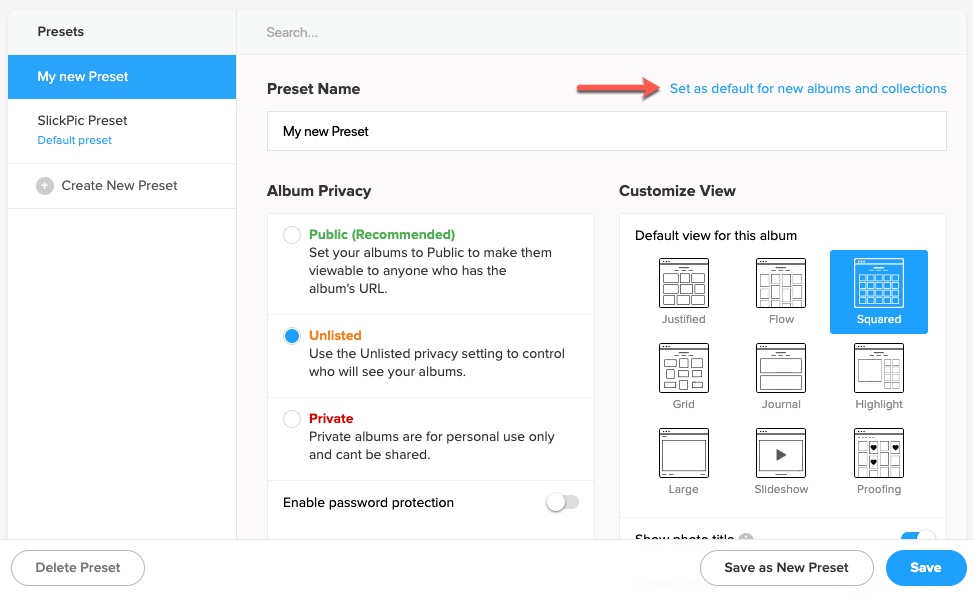
You can easily set a specific preset as the default for new albums and collections by clicking on Set as default for new albums and collections at the top of the preset settings page.
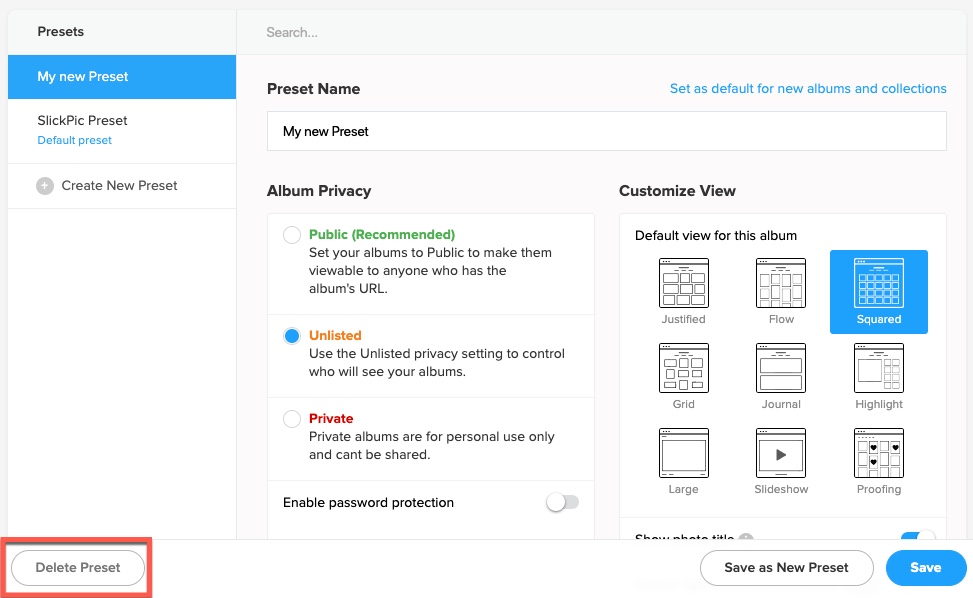
To delete a preset, simply click on the preset you want to delete and look for the Delete Preset button. Click on it and confirm the deletion.
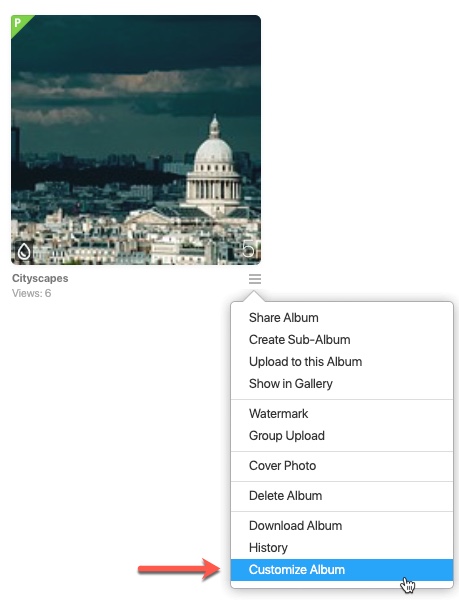
2. Create Album/Collection Presets on your Organizer page
To create presets from the Customize Album menu, first, open your organizer.

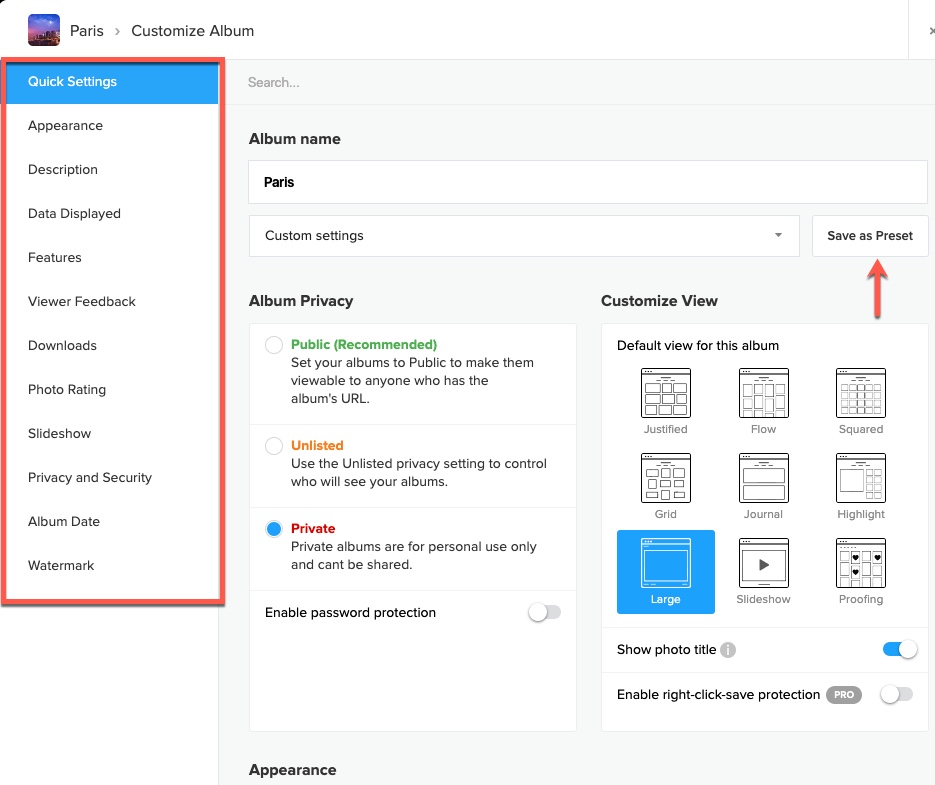
To create presets for your album or collection, open the Customize Album/Customize Collection menu in your organizer
You can set different settings as you did in first method and click Save as Preset
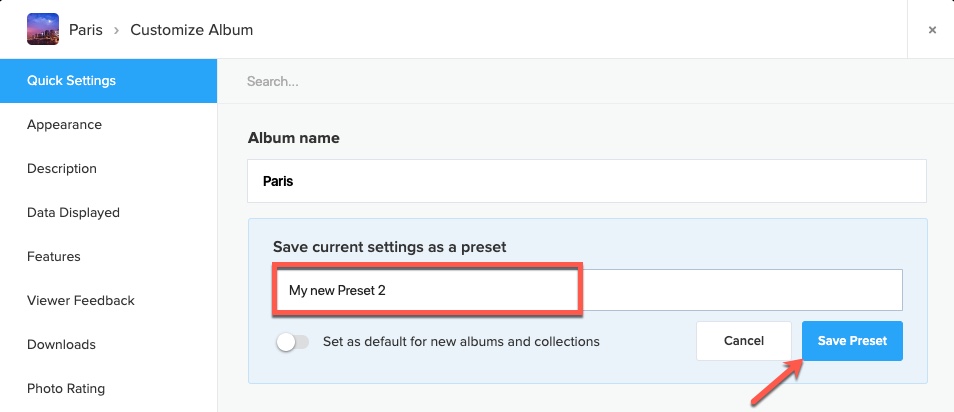
Name your new preset and save it by clicking the Save Preset button.
Step 2 – Apply the saved preset to your Album/Collection
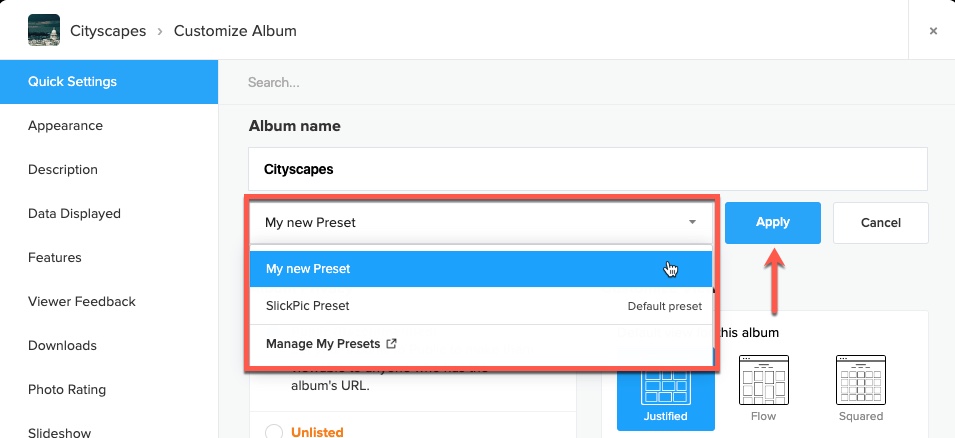
To add a preset to your album/collection, go to your Customize Album menu and select a preset from the drop-down list.
Once you’ve chosen a preset, click Apply to add it to your album/collection.
After applying a new preset to your album or collection in the Customize Album window, you’ll see the changes reflected in your gallery.
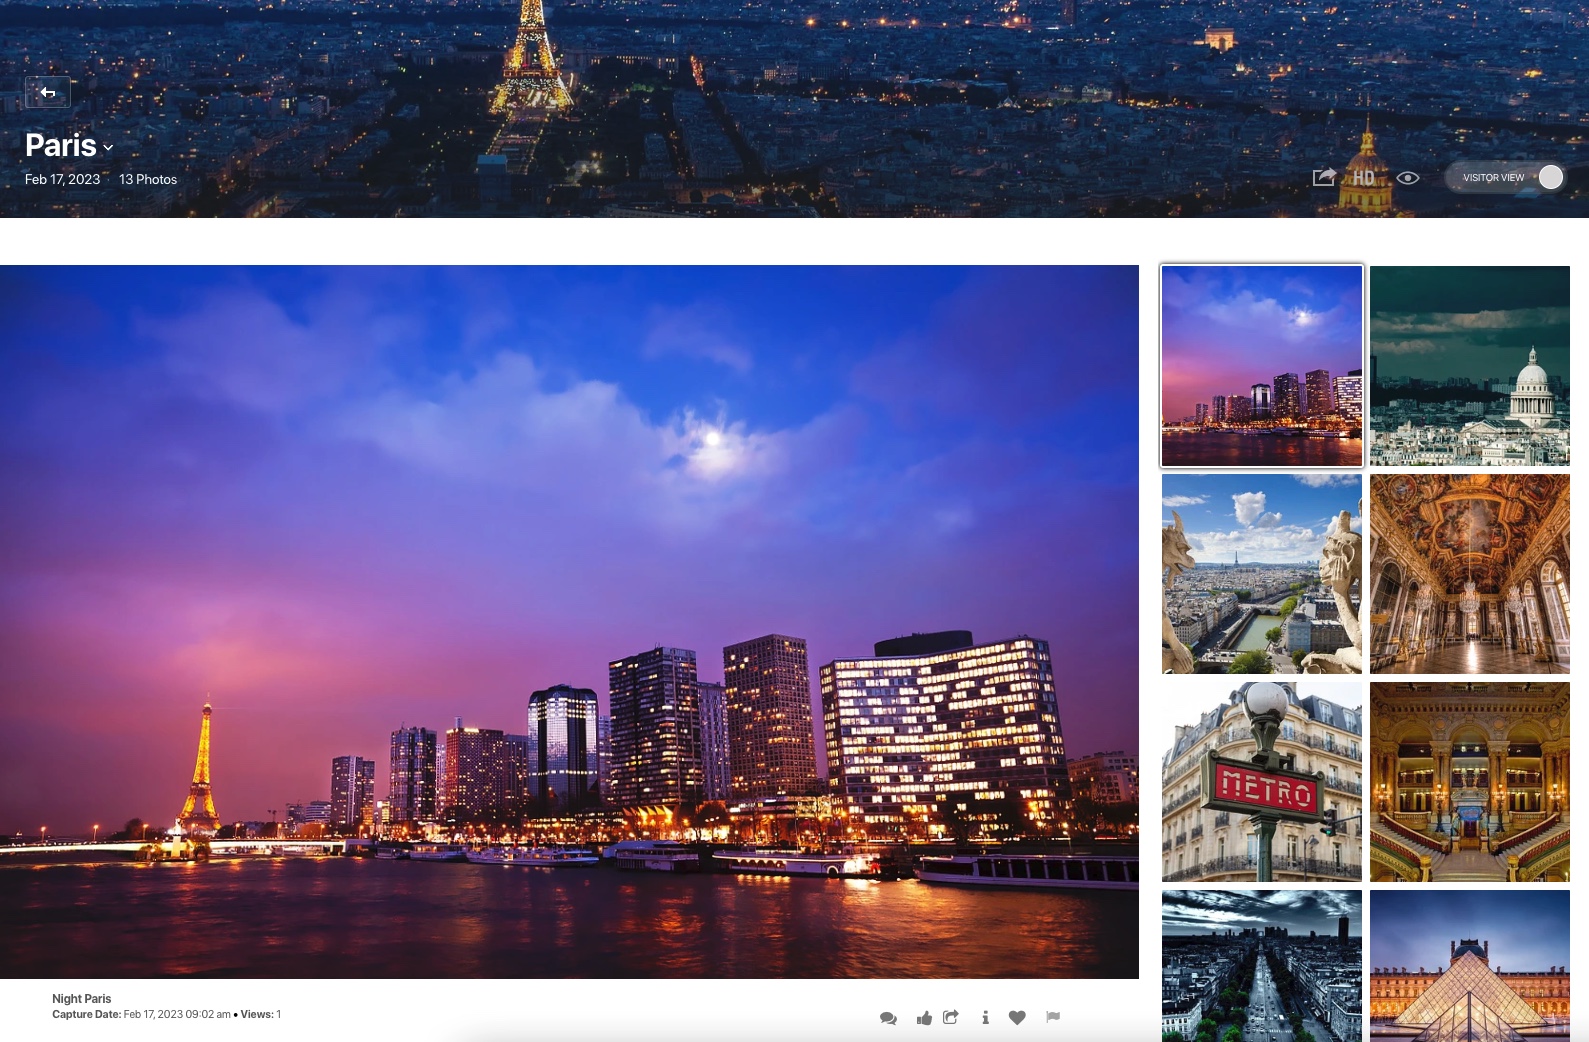
Check out the examples below:
Custom Preset:

New Saved Preset: