
Adding Photos to SlickPic from Lightroom
From Lightroom, select the SlickPic plug-in from the Publish Services section.

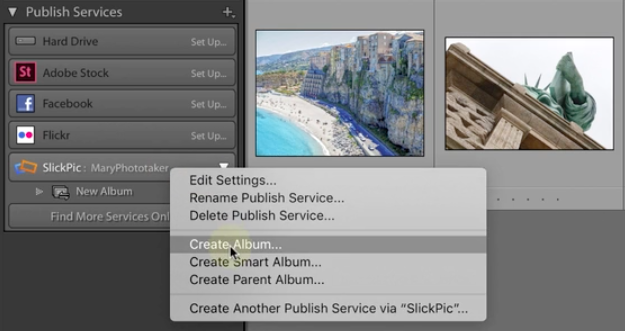
In the settings pop-up, log in to your SlickPic account and click the Save button. Now, in the dropdown menu next to your SlickPic account choose Create Album. Give your album a name and it will appear under your SlickPic account.
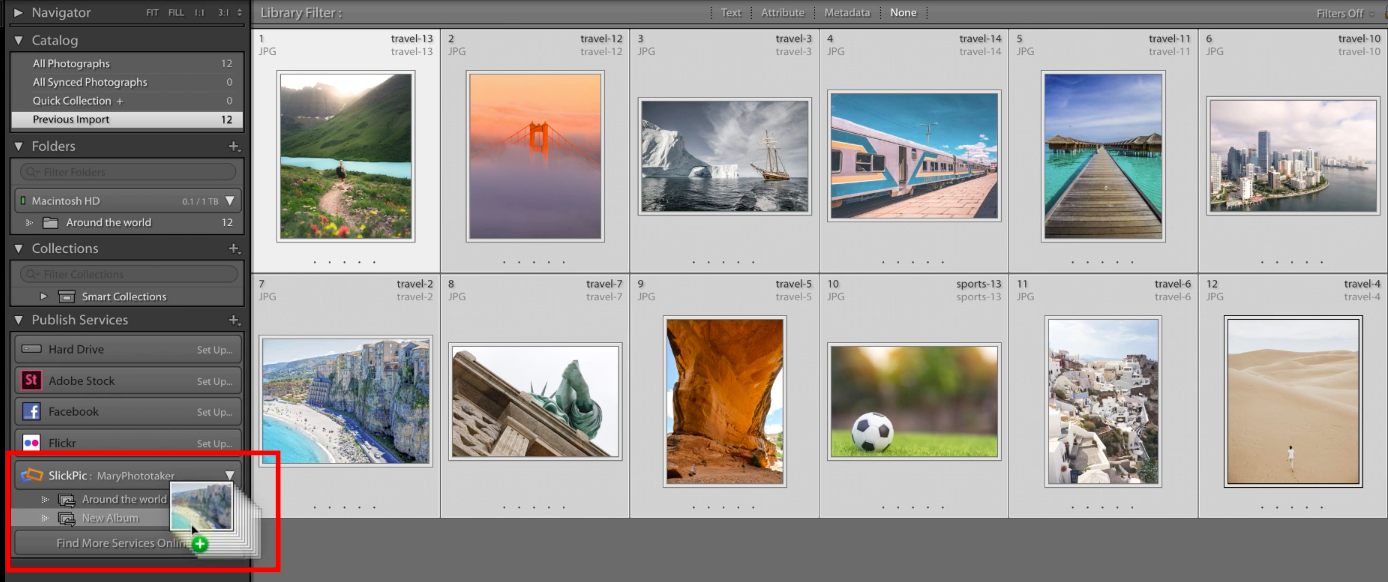
Next, select the photos you would like to add to the album and simply use your mouse to drag and drop them into your album.
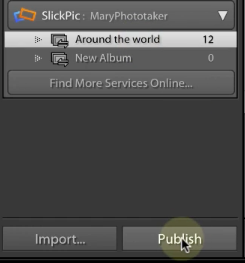
When all photos are added, click the album. Then, click Publish, so your photos will be published in your SlickPic account.
Synching Comments and Likes
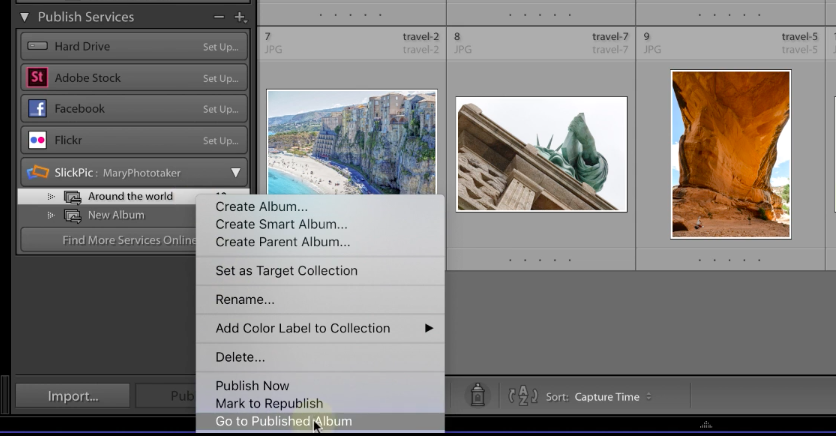
A right click on the album opens a drop down menu. Choose Go to Published Album to see your album in the SlickPic gallery.
Comments and likes, which have been added to your photos by site visitors in SlickPic will also appear in Lightroom.
When you would like to synchronize the comments and likes left for you by site visitors in SlickPic, go back to Lightroom and select Edit Settings.Then, in the Lightroom Publishing Manager, click Update Activity.
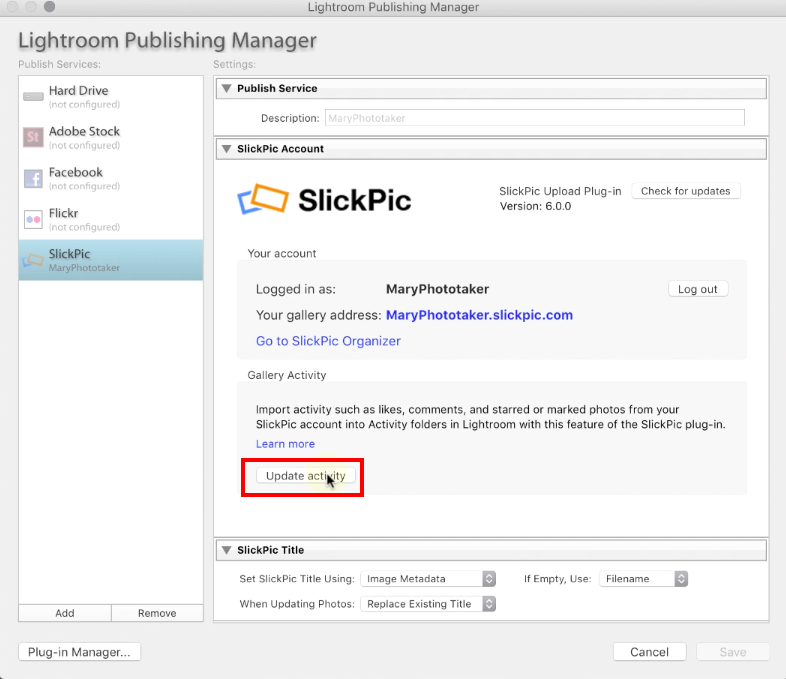
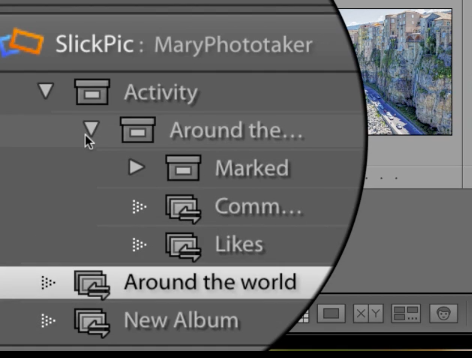
A new Activity folder will appear in the plug-in, containing three new sub-folders; one contains all photos with comments, another has all photos with likes and another has all photos from the album with any activity.
Importing Comments and Likes from SlickPic
To see the latest comments, select the Comments Album and on the right-hand menu, click Refresh Comments.
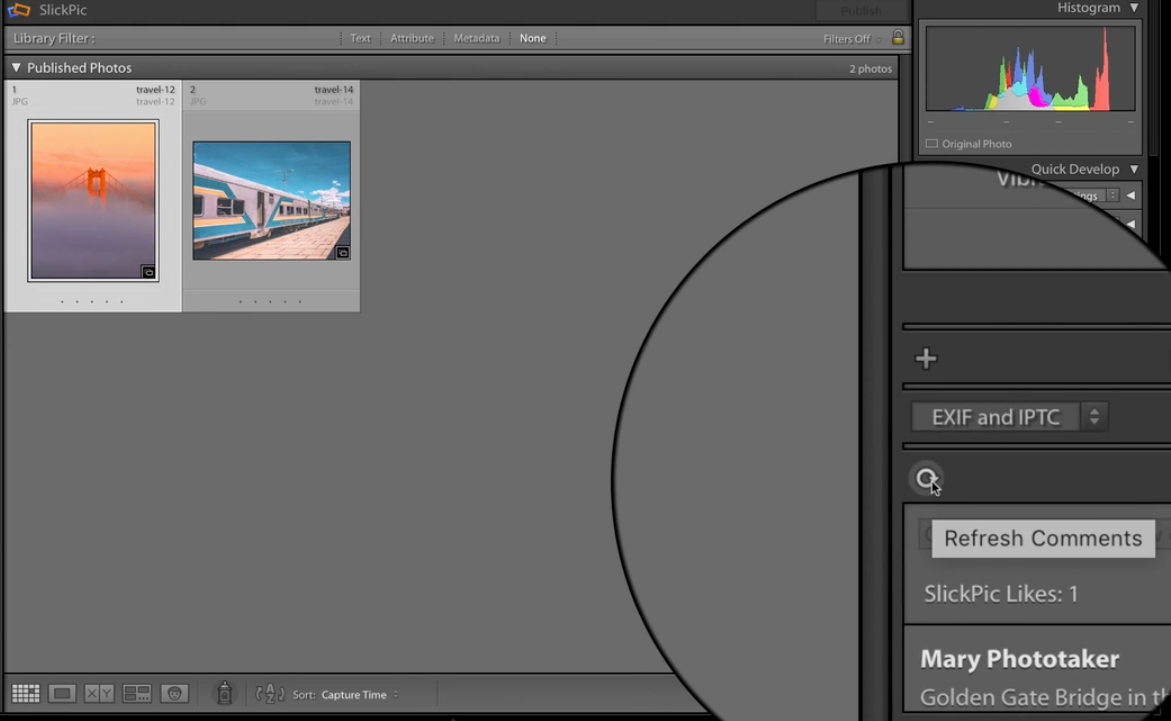
Refresh any time to see the most up-to-date activity.
Downloading Albums from SlickPic
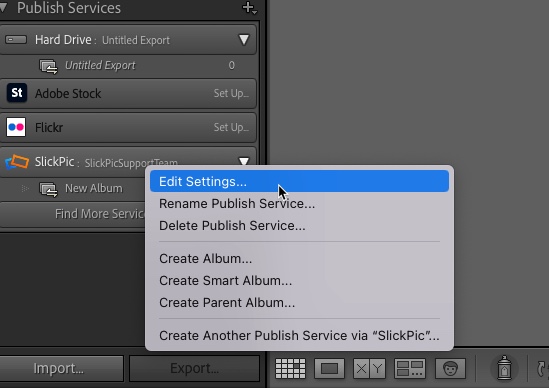
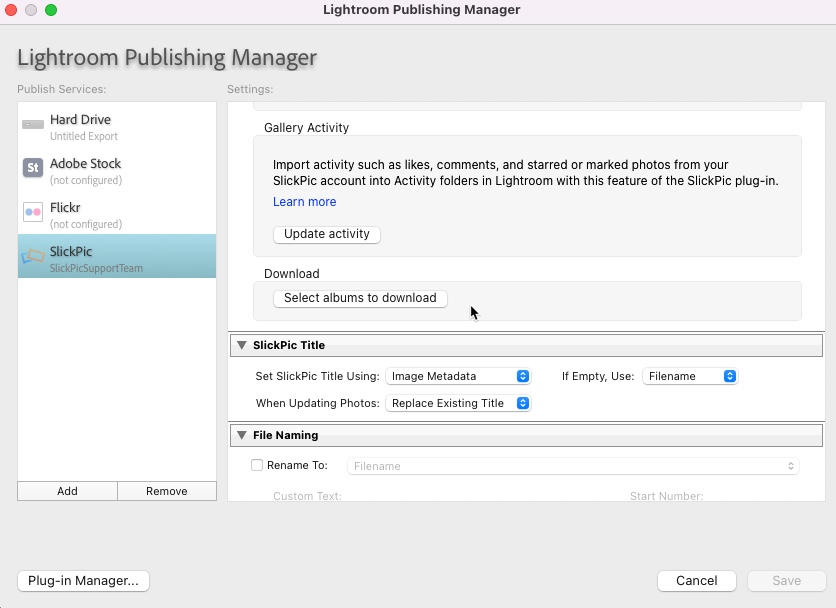
Right-click on the SlickPic username and select Edit Settings.
Go to the Download section and click Select albums to download
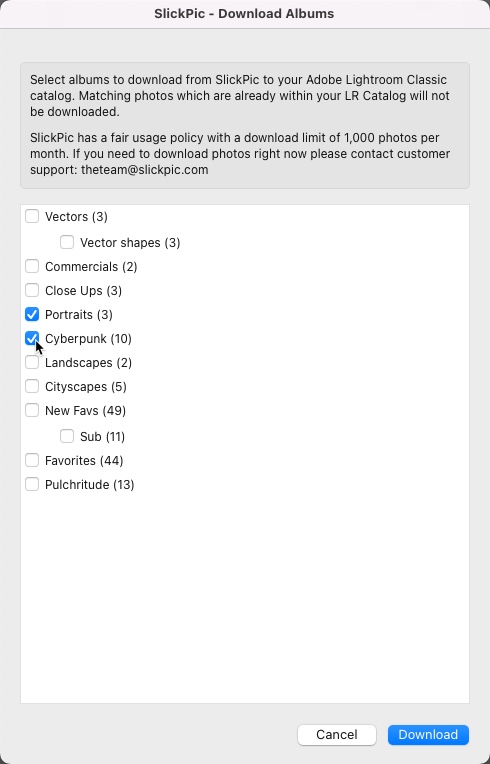
Select the albums you want to download and click on the Download button
Once the downloading process is finished, you will see the downloaded albums under your SlickPic plug-in username
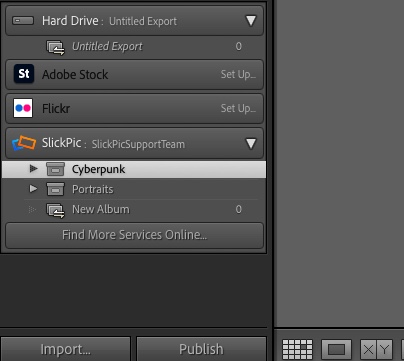
Reminder: If you delete the downloaded albums from your Lightroom plug-in, they will be automatically deleted from your SlickPic.