
Open your album in Organizer.

Setting a Watermark
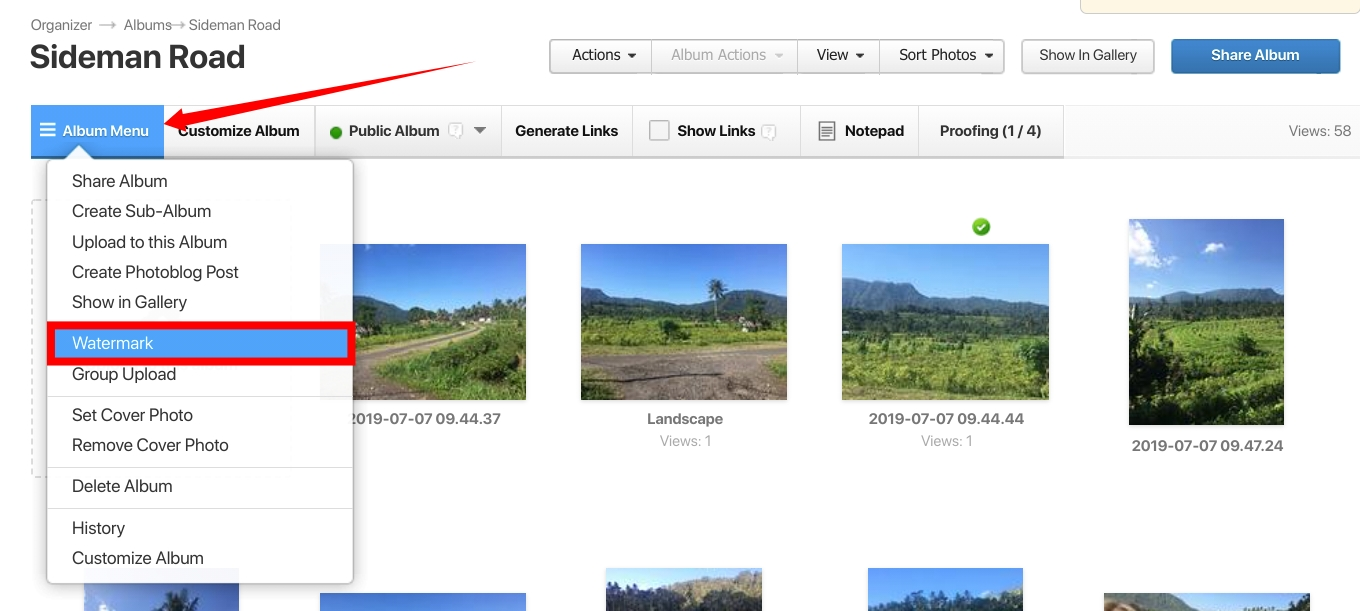
Go to the Album Menu and select Watermark.
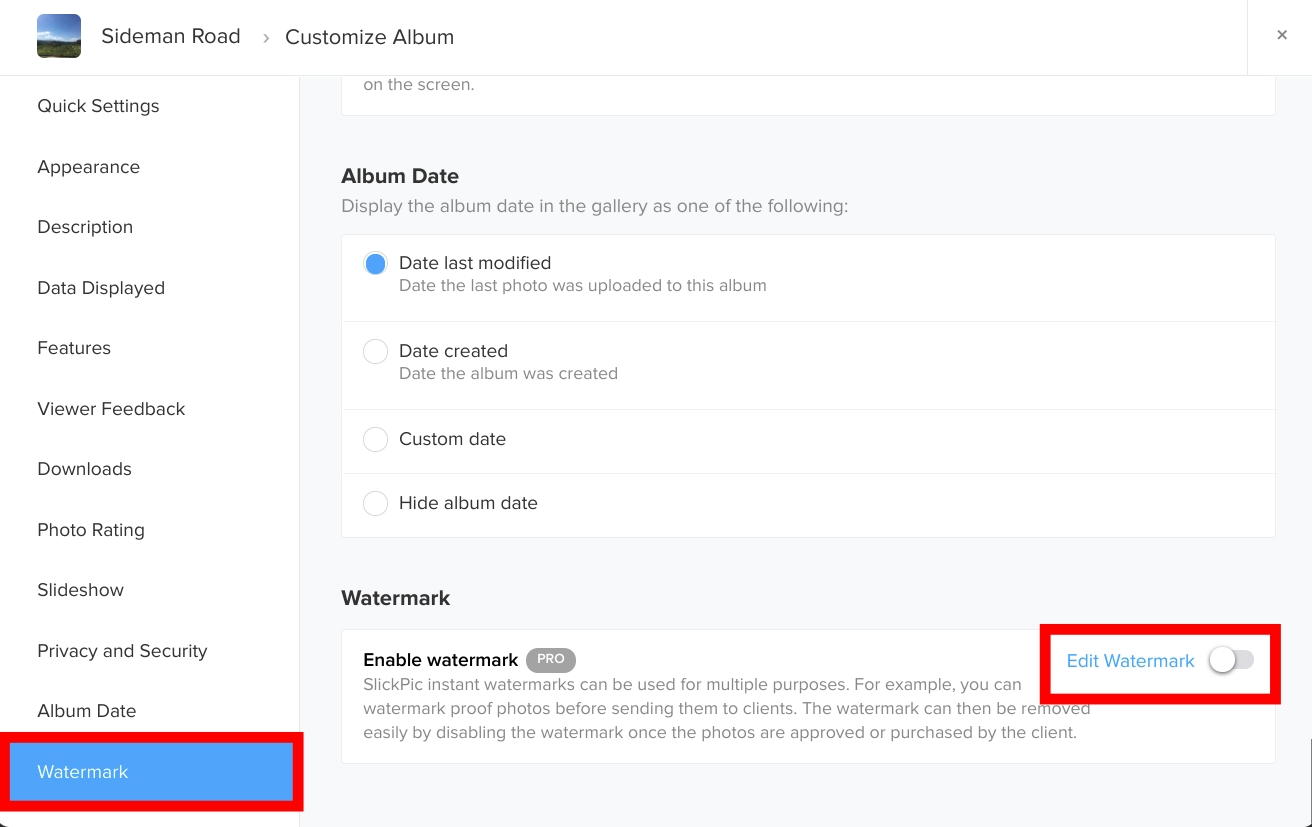
You can also access the watermark manager for your album from the Customize window. Select the Watermark tab and click to enable and you will go straight to the manager.
You have a number of different options for your watermark. For example, you can modify the font, position, color, size and opacity of the text. Or, if you have an image logo that you would like to add as your watermark, click Upload Image and select the image from your files. The settings will apply to all photos in the album.
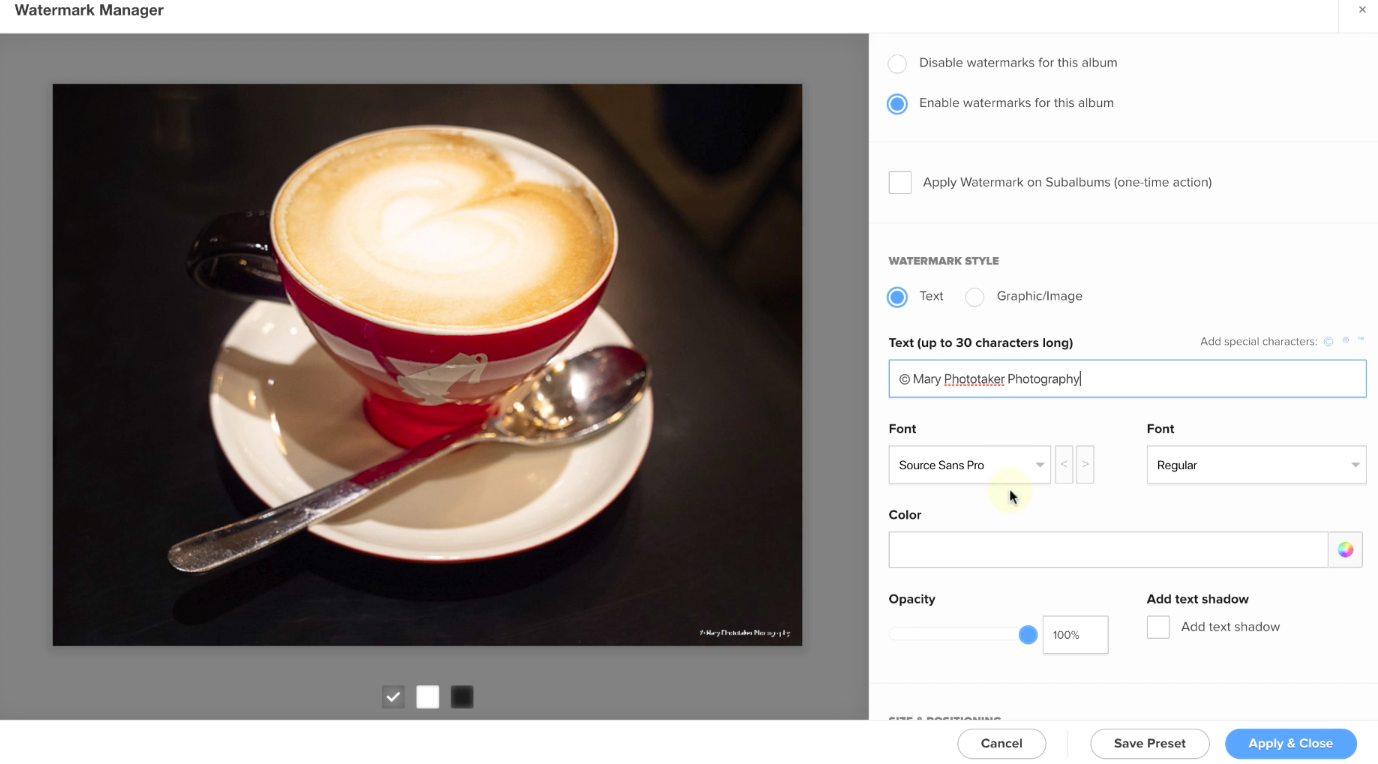
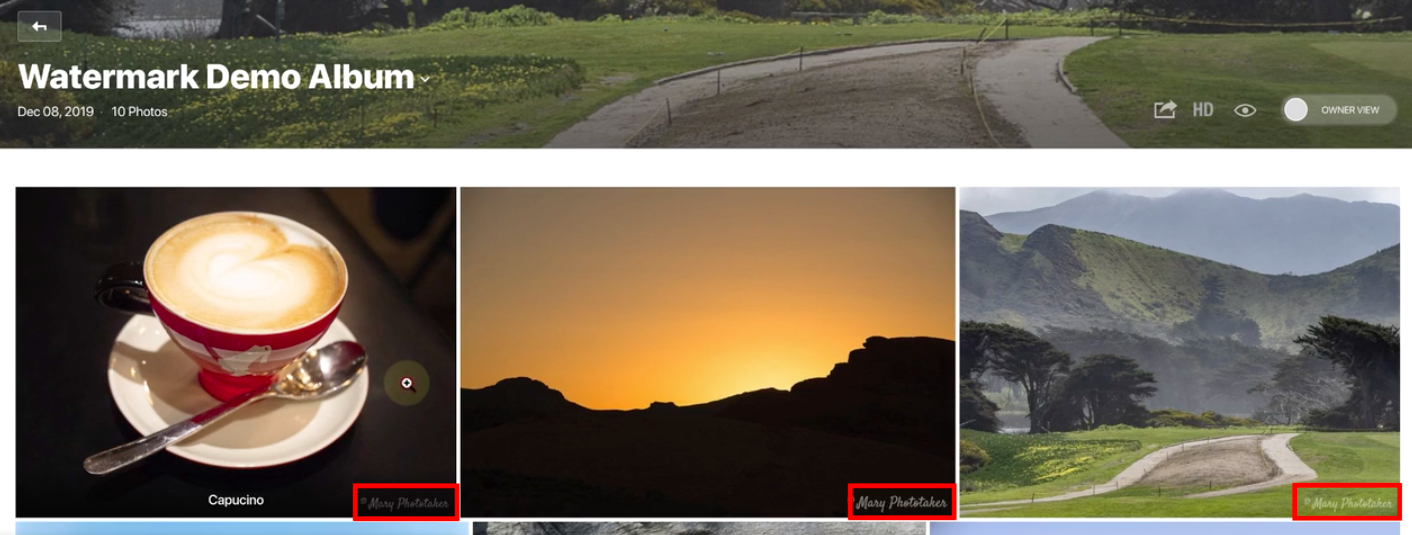
Watermarking the album means that every image in the album or added to the album later will automatically have the watermark.
For more information, please see the following topic: What’s the difference between watermarking the whole album or individual images.