In order to connect your store to your portfolio site, you must ensure first you are connected to a custom domain. If you’re not sure how to do this, check out the article on How to Add a Custom Domain.
Add a Sales Page
Next, you will need to create a page on your site which will be dedicated to sales. Add the page and give it a suitable name. For a reminder on how to do this, see the article How to Add a Page to Your Website
Select the Prints you Want to Sell
Choose the photos you want to sell on your site in the Organizer and add them to their own folder. If you need a reminder on how to do this, see the article on How to Sort Photos in Albums and Collections and How to Upload an Album.
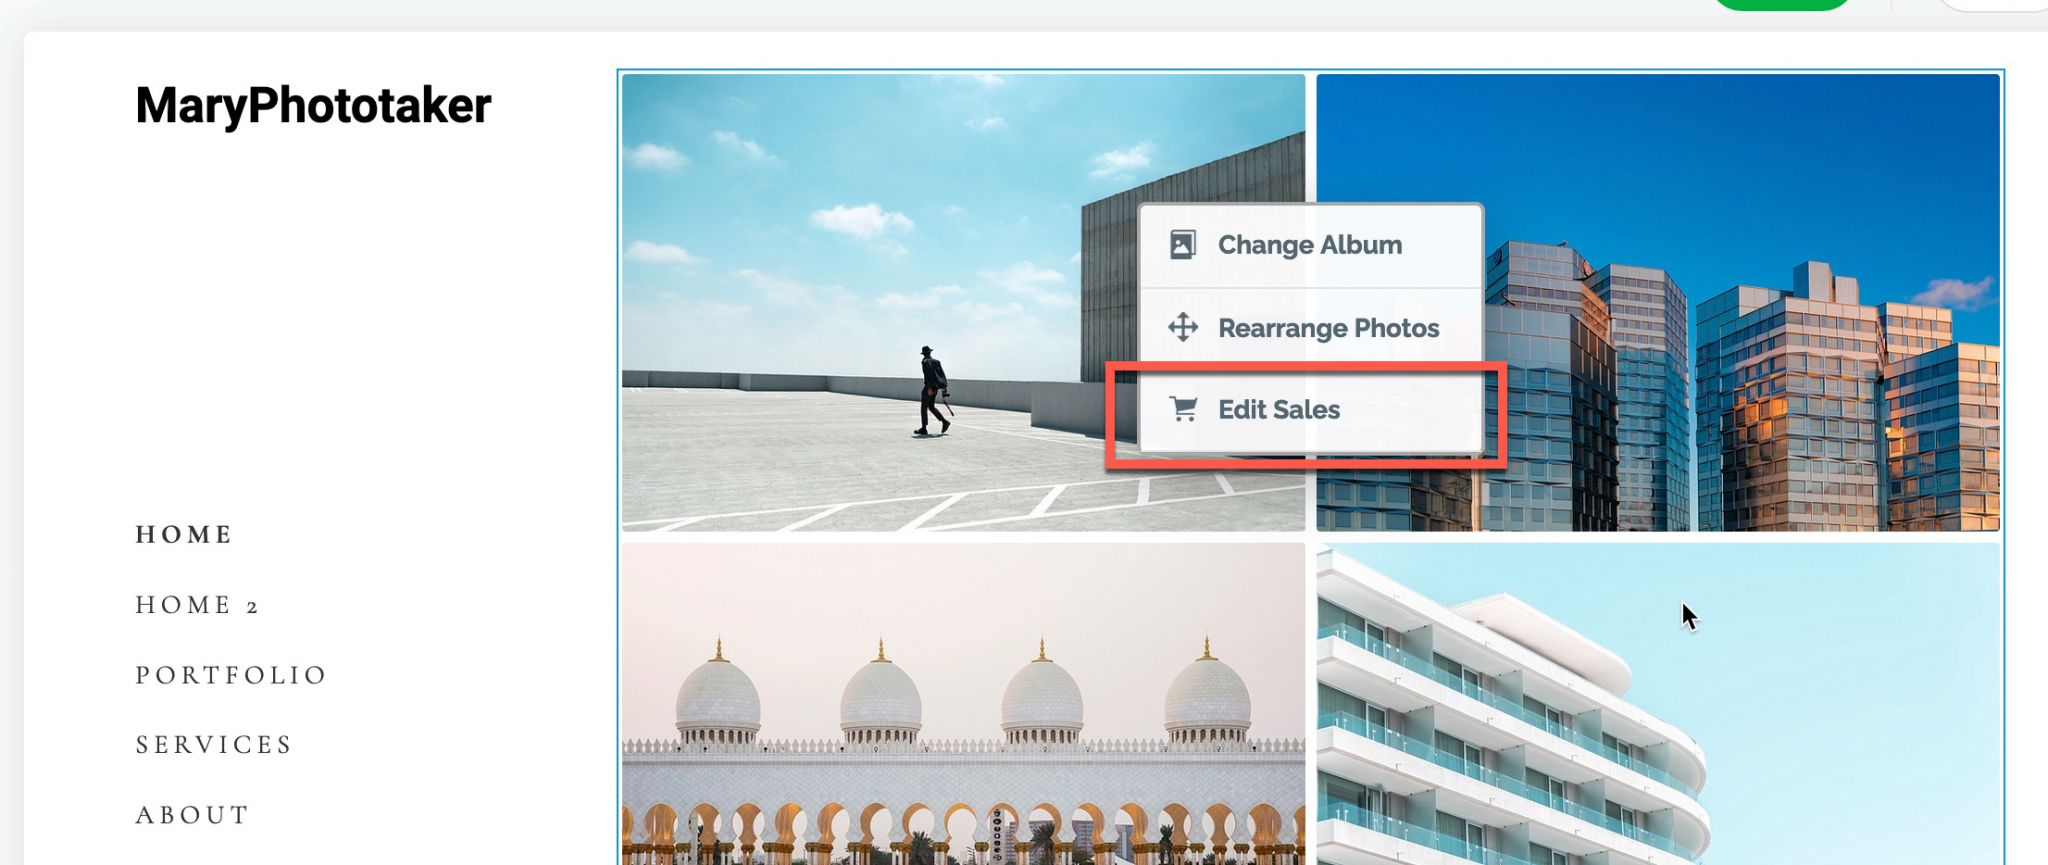
Upload the folder to the sales page. Now, the album edit menu will include the option Enable Sales.

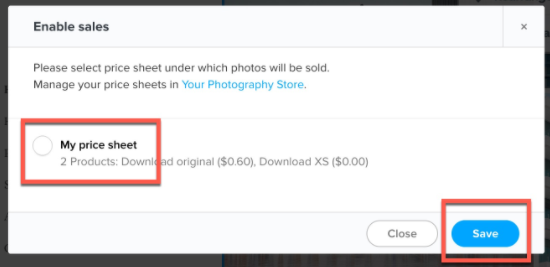
Click this and it opens a window which will ask you to select a price sheet. You can find out how to set up a price sheet in the article How to Set Up Your Store.
When a site visitor comes to your sales page and clicks on any of the photos, it will open in big screen and they will see the button Add to Cart at the bottom right.
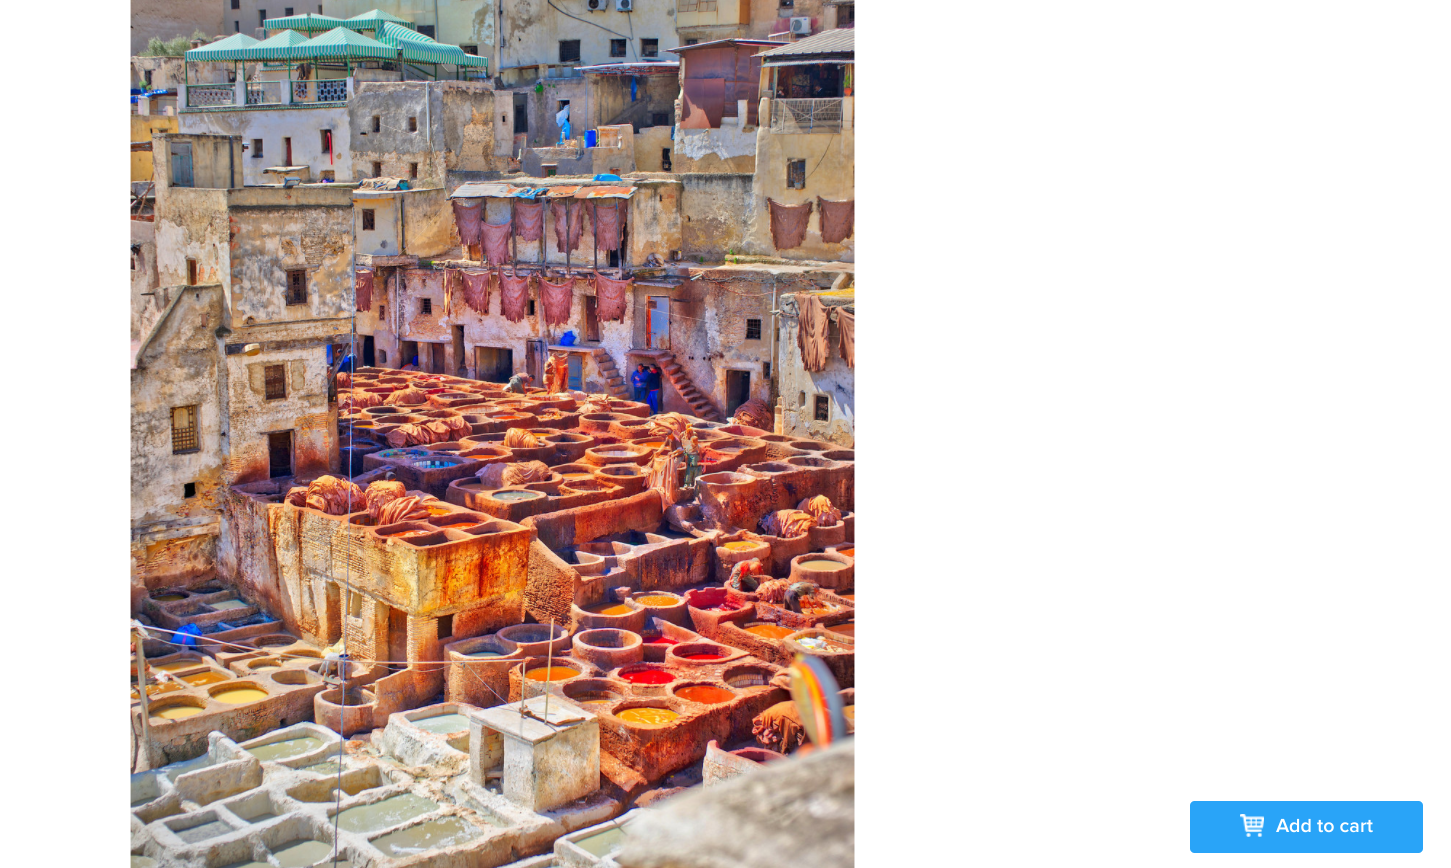
This will open the cart window to the side. Here users will be able to select whether they want to purchase just the download or the print (depending on the options you added in the form).

Once they have selected items for purchase, the user can go to the checkout. They will have to complete some delivery and billing information to complete their purchase.
You will be able to see incoming orders in the
Changing the Price Sheet
If you need to add a different price sheet to your page, just open the album edit menu again and you will have the option Edit Sales. Click to open the window and select a different price sheet.